Sunday, August 9, 2009

wild blueberry pie


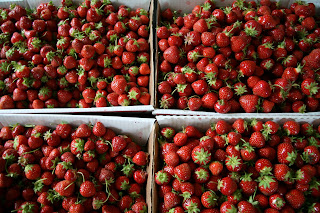
I've had the luck to find wild blueberries twice this summer, once at the farmer's market a few weeks ago, where Jon grudgingly allowed me to fork over a small fortune for a pint, and last Thursday in my CSA share. Our CSA, the Farm Direct Coop, is amazing. Last year was our first experience with a CSA share, and we were somewhat disappointed. The weekly pick up yielded far too much lettuce and greens, which never looked very fresh/appetizing, and hardly any fruit. The lack of fruit was somewhat excusable, as I didn't really notice that this particular CSA was a vegetable share when we signed up, so I supposed I should have been happily surprised when we got any. The CSA was in it's first year, so I am sure it will get better. However, when when the FDC was able to open up more shares this year, we moved up off the waiting list and signed up. They have separate fruit and vegetable shares, and even offer a local cheese share. Everything has been absolutely top notch thus far, and a few things were really amazing, including the pea tendrils, strawberries, peaches and the wild blueberries. The first pint of blueberries I bought I mixed with normal, highbush variety to make a pie (not being quite extravagant enough to buy several pints). Somehow, the crust I made did not turn well. Recently I decided to switch from an all-butter pastry dough to a part shortening variety. I think I was overtly conscious of the humidity that day, and simply did not add enough water to the dough, and it would not stick together when I rolled it out. Subsequently, the crust was flavorful, but not at all flaky, and the top was sort of pieced together in spots. I decided to give it another go this weekend, and it turned out much better. I do think the pie would be over-the-top if made entirely with the wild berries - too bad I don't have any birthdays in July.

Wild Blueberry Pie

Pastry Crust (doubled-crusted pie)
2 1/2C. all-purpose flour
1/2t. salt
12T. unsalted butter, cold
1/4C. shortening, cold
4-6T. ice water

Place flour and salt in a large food processor; pulse until mixed. Cut butter into ~1/2inch chunks and add to processor. Add shortening in ~4 spoonfuls over flour mixture. Pulse just until pea-sized chunks of butter and shortening are still visible. Sprinkle 4T. ice water over mixture. Pulse until mixture just starts to come together. Squeeze a handful of dough to see if it sticks together; if it still appears crumbly/your hand appears dusty, repeat, adding ice water 1T. at a time. When mixture holds together, pour onto counter top and smear with the palm of your hand until entire mixture is smeared. Scrape into 2 balls of dough, one slightly larger (this will be the bottom crust), and form ~1inch disks. Refrigerate at least 1h, up to 24h.

Filling
30oz. blueberries (I used 12oz. wild berries, and the remainder highbush berries; ~6C. total)
1T. lemon juice (~1/2 lemon)
1C. sugar
2T. all-purpose flour
2T. cornstarch

Place a large jelly roll pan/cookie sheet in oven and preheat to 425 (preheating the cookie sheet will enable the bottom crust to crisp better). Mix berries in a large bowl. Sprinkle with lemon juice. Mix remaining ingredients in a separate bowl, then toss with berries. Roll out large piece of dough. Place in a 9inch pie dish, then place in fridge while rolling out the top crust. Roll out top crust, and cut decorative holes if desired. Remove bottom crust from fridge, then add berries. Place crust on top, and crimp edges. If you want a glossy, browned crust, whisk an egg with 1T. water, and brush lightly over top. Bake for 45-60 minutes, or until berries are bubbling in center of pie. Check periodically to make sure crust is not browning too much, and cover with foil if necessary. Cool at least 1h on rack before serving (this will help set the filling).


pick-your own fruit

I spend half the summer trying to figure out when and where to pick fruit that I can stock-pile in the basement freezer for the winter, to make jams, and to generally eat copious amounts of fruit without feeling guilty over the amount of money I've just consumed in a very short timespan. I am fully aware that between the 2 of us, no matter how much fruit we purchase, we seem to eat all of it within 2-3 days of purchase (this is a generous estimate). This doesn't so much apply to apples and oranges in the winter, but all forms of berries and stone fruit during the short growing season. In Massachusetts, Vermont and New Hampshire there are many, many fruit and vegetable farms. This is a wonderful thing. However, I have several qualifications for a topnotch, visit-every-year (or multiple times per year) farm. It seems simple, but I want to pick great fruit at reasonable prices at a farm that is focused on growing produce, not on 'agritainment'. A nice produce stand is a plus, but not necessary. Many places I have found are more of a novelty, where people drop by on there way home from the beach to pick a pint of raspberries. Many of these places also are more focused on entertaining families, with petting zoos, ice cream stands and hayrides. I can understand the rationale; these farms are trying to make money, and set themselves apart from the other farms. However, I want to pick lots of fruit, and therefore don't want to pay grocery store (or more) prices, since I am picking it myself. I know I am getting better fruit, but there should be some discount for labor. I love to see families picking fruit together; it's a great learning experience as well as a productive activity. But, if the fruit picking part is more of a sideshow to the ice cream stand, I would rather not deal with these people. Anyhow, as I visit more of these places, these are my favorites:

Verrill Farm, Concord MA
We went strawberry picking here; the strawberries were amazing and well priced. And this was in a year where we had a solid month of rain and no sun. I would imagine other years are even better. The farm stand also had great vegetables; we purchased chiogga beets, bunches of radishes and some great greens. Concord is a beautiful area, and a nice place to have lunch/shop on your way home. Also near De Cordova Sculpture Park and Museum.
Brooksby Farm, Peabody MA
We picked apples and strawberries here. Great location, well-priced fruit.

TBD
Smolak Farms, North Andover MA
This farm lists daily picking conditions on their website. We are planning to pick peaches here in a few weeks. The are planning to have sour cherries in 2010! This would be a miracle.

Farm stands:
Green Meadow Farms, South Hamilton MA
Everything at this farmstand is wonderful. They have a CSA, and carry loads of veggies.

porch tomatoes


Tomato blight? Not my tomatoes. My six heirloom plants, purchased as seedlings from the Seed Savers Exchange, are doing amazingly well. It seems that the combination of big pots, miracle grow soil, watering daily, and the porch roof locating works. I did have a minor catastrophe when I had to retroactively put the cages on (note to self: next year do this early, when the plants are small). Several of the vines split, and I had to mend them with tape. It sounds ridiculous, but they really do heal themselves and all of my taped vines survived. It does make me wonder how it is that a plant can produce a fruit that it can't seem to bear the weight of without human intervention....... Some plants seem to be more prolific producers than others, but I am keeping a tab on the tomato yield per plant:

Amish Paste: 6
Brandywine Sudduth: 1
Trophy : 5
Green Zebra: 5
Hungarian Heart: 3
Unknown (lost label): 2

As of now, there are 50+ green tomatoes out there, and ~10 turning pink or orange. I love climbing out onto the roof and monitoring the tomatoes every day. Jon makes fun of me, but I really love those tomatoes.


Saturday, August 8, 2009

raspberry curd

We tried to go cherry picking several weeks ago. Well, technically we did go picking, but we did not come home with any cherries. I have determined that cherry orchards don't exist in New England. The thing is, we searched high and low, and found a website that indicated they had sour cherries. We called, and they said the sour cherries were available for picking. They seemed somewhat pricey, but food prices have gone up, and the orchard was a little further than we would have like to drive, but we love cherries, so we went. There were no sour cherries. They had bing cherries, which looked more like dried cherries, all cracked and shriveled on the trees, and the woman indicated a row in which there were 'red cherries' (i.e. not as ripe) that were similar to sour cherries. Let me tell you, these were not cherries worth eating, much less worth picking. But, we had driven all that way, so we had to return home with something. The raspberries were delicious (but pricey). I made both a raspberry tart, and raspberry curd. I don't know why, but it never occurred to me that you could make curd with something other than citrus. We mostly at the curd mixed with yogurt, but it would be excellent drizzled over pound cake, mixed into oatmeal, or even in a smoothie if you wanted a dash of sweetness.

Raspberry curd (adapted from Thane Price)
2 1/4 lb raspberries
1lb sugar
4T butter
4 large eggs

Place berries and 2T water in a saucepan and bring to a boil. Simmer, covered, 5 minutes, or until fruit is very soft. Press mixtures through a fine mesh sieve into the top half of a metal bowl, or double boiler. Add sugar, butter and eggs. Place over a bowl of gently simmering water, and gently whisk until the sugar has dissolved and the butter has melted. Continue to simmer, stirring constantly, until the mixture thickens. Remove from heat and cool to room temperature. If mixtures isn't as thick as you would like, you can return to the stove and cook for longer. It will thicken as it cools.

Ladeled into hot, sterilized jars this will keep for 3 months in the fridge.

Sunday, July 19, 2009

Paella

There's not much better than a great paella. The right paella recipe is a combination of absolute essentials and then pretty much whatever you want. The base requires the right rice, broth, saffron, chorizo, oil and salt. My standard additions include chicken thighs and shrimp, with peas to add a little extra color, plus whatever I have or can find that would be a good fit. To get the right texture you must avoid stirring once you've added the broth. I like to make it outide on the grill using a jelly roll pan (one that you don't mind discoloring a little). You can buy a special paella pan, which is like a slightly deeper round cookie sheet with dimples on the bottom. I've had fine results with just a standard jelly roll pan. Don't forget to squeeze the lemon on as you eat it.
Adapted from Zingerman's Guide to Good Eating.

The essentials:
1 1/2 C paella rice
6+ cups of chicken broth (or fish)
1/2 tsp. saffron
4 oz chorizo (the spanish, cured version), cut into 1/8 inch coins.
4 Tbs. olive oil
2 Tbs. coarse sea salt
4 Tbs. chopped parsley
Lemon wedges

The regulars:
6 chicken thighs, with skin, about 1 lb.
1/2 lb. or more shrimp
1/2 cup fresh or frozen peas

Other options:
1/4 C. Roasted red peppers
1/4 lb. clams
1/4 lb. mussels
Any kind of seafood

  • 30 minutes in advance, add the saffron to 1/4 cup boiling water.
  • Get everything read and take it out to the grill. Heat the broth to a simmer with the safron and safron liqiud.
  • Heat the jelly roll pan over high heat on the grill. Add the olive oil and let it heat for a minutes, stirring to coat the pan.
  • Add the shrimp and cook, flipping once, until just pink (~4 minutes). Remove and set aside.
  • Add the chicken thighs, skin side down and cook several minutes.
  • Add the chorizo and salt, cook for several minutes,stirring to distribute oils.
  • Flip the chicken to the non-skin side, coating in oil and move to one corner to advoid getting rice on top.
  • Add the rice to the pan, stirring to coat in oil. Cook the rice in the chorizo and oil for several minutes, stirring. Spread the rice evenly over the bottom of the pan.
  • Add most of the broth (4 to 5 cups), spreading evenly around the pan. Even the rice out into an even layer again.
  • 8 minutes into cooking, add the shellfish and peppers if using, arranging around the top. Do not stir the rice.
  • Allow to cook, without stirring, for 15 to 20 minutes. The time will depend on the rice. Sample a bite at about 12 mintes to test the texture and salt. Taste every few minutes. Add more salt if needed. Continue to cook until the texture is right. Add more broth if it has dried, being careful not to end with too much. Ideally, it wil finish with little or any broth left, so that the bottom develops a slight crispyness.
  • At the 12 minute mark, add the shrimp again and the peas.
  • When the rice is done, remove from heat. Sprinkle with parsey.
  • Serve with a lemon wedge on the side.


Tuesday, June 30, 2009

fenneled beets

I discovered a new beet recipe. Many, many recipes pair roasted beets with a minted viniagrette, and I can see why. I've substituted parsley, or other fresh herbs I have on hand, but it's just not the same. I've been eyeing this recipe from Deborah Madison for beets with fennel vinaigrette, but I so love the minted beets that I have been unable to stray from my old stand-by. I somehow acquired a large supply of beets in my drawer, so I finally tried the new recipe. An extremely simple recipe, and a completely different tasting one. I can't quite put my finger on it, but the beets acquire a flavor that is greater than the sum of its parts. Maybe it's the sherry vinegar???

Roasted beets with anise vinaigrette, adapted from Deborah Madison
1.5lbs. beets (I used a combination of yellow, purple and chiogga)
salt & pepper
1t. anise seeds
1 garlic clove
2t. sherry vinegar
2T. olive oil

Preheat oven to 375deg F. Peel beets and cut into 1/2in. dice. Toss with a sprinkling of olive oil, salt and pepper. Spread in a single layer on a sheet pan and bake until beets begin to caramelize, and are tender, around 35 minutes. Crush anise seeds with garlic clove and a pinch of salt. Whisk in vinegar and olive oil. Pour vinaigrette over beets and marinate for several hours or overnight (this really makes a huge difference).

Sunday, June 28, 2009

rhubarb marmalade

Moving along with my jam-making spree, I made a batch of rhubarb marmalade. It made roughly 6 80z. jars of preserves, and took ~2lbs. of rhubarb, 2 oranges (juice and zest), 3/4lbs. of sugar and half a box of no-sugar required pectin. I also grated ~1 inch of ginger and added that, too. I have become more daring with the pectin, and used less than half of what was called for. It is still sweet, but you can taste the tartness of the rhubarb more. I do think you could use less orange, because this stuff is pretty orangey. It has a nice peach hue, but I was expecting it to look more pink.

rhubarb souffle

When presented with too many leftover egg whites recently (probably as a result of making too much ice cream), and not having enough for an angel food cake, I began to scour my cookbooks for interesting recipes. In the Silver Spoon cookbook, I came across a recipe for rhubarb souffle. Given my love for rhubarb, this immediately seemed appealing. Also, the entire concept of making fruit souffles seemed to create endless possibilities. It essentially involved making a rhubarb compote on the stove top, then stirring the compote into whipped egg whites. That the recipe said to stir and not fold the rhubarb into the whites seemed odd to me, as well as clearly destined to deflate the whites, but somehow it seemed to work. In retrospect, there isn't a drop of fat in the recipe, which probably explains it. It miraculously also seemed to be more stable than past souffles I have made. Lifting it out of the oven, it looked amazing, like a giant pink meringue.

Rhubarb Souffle, The Silver Spoon
7oz. rhubarb, sliced into thin matchsticks
1C. powdered sugar
3T. superfine sugar
4 egg whites (120g)

Sprinkle powdered sugar ove r the rhubarb and sit at room temperature 2 hours. Preheat oven to 325 deg F. Grease a souffle dish, or other oven-proof dish with butter and coat with sugar. Add superfine sugar to 2T. water in a sauce pan, and bring to a boil. Add the rhubarb and cook for 2 minutes. Beat the egg whites until stiff; add rhubarb mixture and beat for 1 minute. Pour into prepared dish and bake for 25 minutes.

Saturday, June 27, 2009

spring-early summer ice creams

I hauled out my ice cream maker recently, in a blatant attempt to demonstrate to Jon that ours is in desperate need of replacement. When we received it as a gift nearly 10 years ago, it seemed to be a complete extravagance - who really makes their own ice cream? Apparently, us. We have used it so much that the container is warped to the extent tht the top barely manages to stay on when it's churning, and we long ago had to tape down the button with packaging tape. Last year, Jon ordered a new blade to replace the one that had cracked and been repaired with duct tape (this was sweet, but also irritating, since this was one of my arguments for replacing the machine). So far this spring, I have made three ice creams; fresh mint, strawberry and mint/basil. There really is something special about homemade ice creams. Last year we developed a chocolate-strawberry-balsamic recipe, inspired by a gelato we used to purchase at Zingerman's. I am going to make it this year with my strawberry jam - hopefully it turns out as good. Tonight I am eating the strawberry, and thinking that it would make a good combination with the mint/basil in the freezer.

napa cabbage

I feel very fortunate to have been exposed to two new vegetables recently: kohlrabi and napa cabbage. When we got the kohlrabi, it arrived with pea tendrils, and I was miraculously able to find a salad recipe which used both. For the napa cabbage I improvised a recipe from Deborah Madison's Vegetarian Cooking for Everyone, and despite missing several ingredients/not quite having enough of a few things, it was amazing. I imagine it would be even better made as described.

Napa and Savoy Cabbage Salad with Peanut Dressing
1/2-3/4lb napa cabbage, sliced
2-3 carrots, grated or julienned
1 cucumber, sliced into matchsticks
3-6 scallions
1/2lb savoy cabbage, sliced
2T. chopped mint
1T. sliced basil leaves
1/4-1/2C. peanuts (optional)

Peanut Dressing
1/4C. roasted peanut oil
2 1/2T. apple cider vinegar
1T. soy sauce
1 garlic clove, minced
1 serrano chile, diced
2 scallions, diced
2T. mint leaves, chopped
2T. basil, chopped
2T. cilantro, chopped
pinch salt

Make dressing: combine everything and mix together. Add salt to taste.
For salad, toss together vegetables and herbs. Pour dressing over top and toss to mix. Sprinkle with nuts if using.

Note: the recipe as written calls for thai or anise basil, which I didn't have on hand. I also made it without the nuts, and it turned out fine. The amounts of herbs can be varied to ones liking, and it can be made without the chile, but it is not nearly as good.

strawberry jam


We finally got a day of sunshine, after what seemed like a beautiful spring turned into an entire month of rain in June. Somehow, the strawberries managed to pull through. We've been getting quarts from our CSA share every week, and we picked over 20 pounds of strawberries in Concord last weekend. We ate so many both our fingers and mouths were red and sticky, and even my tummy was starting to hurt (only a little). I tried a new tart recipe that I was not very satisfied with. Then we made jam. I made two kinds of jam from a recently purchased book, Jams Jellies and Chutneys, by Thane Price. My first batch was strawberry-rhubarb, which I added fresh grated ginger to half of, and vanilla bean to the remaining half. Both of these tasted amazing, and of the moment I cannot decide which I like better. The larger batch was pure strawberry jam, and the recipe was interesting in that the sugar, berries and lemon juice were mixed, then macerated overnight. Following this first incubation, the mix was boiled, then incubated for 48hours. A friend recommended that I try Ball's no-sugar required pectin; I was extremely excited about this, since my major objection to many preserves is that they are just way too sweet for my liking, and that the sugar disguises the pure fruit taste. After purchasing the pectin, I noticed that the recipe enclosed called for some form of juice (mostly apple or grape, depending on the fruit); I had neither, and since I wasn't planning on going sugar-free, but just sugar-less, I chose to ignore this addition. All of the preserved set fine, and I used half the amount of sugar indicated. I may try less next year, but I didn't want to completely ruin my first shot.


Thursday, May 14, 2009

Happiness = an egg on top

Nothing is more thrilling than an egg on top. It sounds odd, but putting an egg on top of an otherwise basic dish really turns it into something special. The penultimate 'egg on top' dish is the Korean bibimbop. I distinctly remember the first time I encountered this particular dish. I was in college, and a woman I worked with picked it up for lunch. At the time I had little exposure to ethnic food outside of greasy Chinese, having grown up in the rural Midwest where ethnic food meant Italian. Imagine my mother's shock when I came home requesting hummus, which I was first exposed to at my dorm cafeteria. When I saw Kristin eating the bibimbop, not only did I think it looked odd, but it did not smell remotely appealing. Then, somehow, the third or fourth time she ate it I suddenly acquired a craving. As takeout goes, this is as good as it gets. I like to eat it in or out, vegetarian or not, and I love the kimchi and other sides that come with it. I love it so much that I rarely stray from this menu item, which is atypical. However it's done, it has to have the egg on top. I eat an egg on top of greens, lentils, pasta and rice dishes. I like eggs in any format, but when it's on top, it has to be sunny-side up. Happiness on a plate.

Tuesday, May 12, 2009

overnight waffles

Unlike my husband, I am not much for sweets in the morning. Weekdays fruit on plain yogurt with a sprinkle of granola is about as sweet as it gets, and I definitely do not like sugary cereals. For weekend breakfast, I usually go for an omelet or an egg sandwich. I do like waffles on occasion, so recently I managed to think far enough in advance to make the overnight waffles from Mark Bittman's How to Cook Everything. I had noticed this particular recipe, and countless other overnight recipes when rifling through cookbooks on Sunday morning, but of course it was always too late to make them. A few weekends ago, I finally made the recipe, and they were both super easy to mix up, and crazy delicious; they were hands down the best waffles I have ever made. Another appealing aspect of this recipe is that the waffles are not overly rich/heavy, unlike many other breakfast foods. I am going to try using different flour types in the near future, maybe part buckwheat.

overnight waffles

1/2t. instant yeast
2C. all-purpose flour
1T. sugar
1/2t. salt
2C. milk
2T. butter, melted and cooled
1/2t. vanilla extract (optional)
2 eggs

The night prior to cooking, combine dry ingredients, then stir in milk, butter and vanilla. Cover and let sit out at room temperature overnight. Preheat waffle iron, and brush lightly with butter or oil. Separate eggs, and stir yolks into batter. Beat whites until they hold soft peaks, then fold into batter. Spread ~1/2C. into waffle iron and bake until done, around 2-5min. per waffle, depending on your iron. I like to serve mine topped with yogurt, berries, granola and drizzled lightly with honey or maple syrup; an alternative is apple sauce mixed with yogurt.

**I like to make a big batch, then freeze the remainder; they crisp up beautifully in the toaster oven.

mint: my new favorite herb

I have always liked mint tea, and in ice cream, hot chocolate and mojitos. Beyond that I had only rarely cooked or baked with it. This all changed last summer when I bought a bunch to sprinkle over a bowl of roasted chiogga beets. I love beets, but it this was a revelation, along the lines of my strawberry-basil epiphany. The mint provided a distinctive, refreshing flavor that when mixed with the beets didn't quite taste like mint, but was more amorphous. I think I had shied away from mint previously because I thought it would overwhelm anything mixed with it. What followed was roasted cherry tomatoes with mint, strawberry-rhubarb compote with mint, and a near requirement for mint with roasted beets. I've since been buying a bunch every month at the store, and am really hoping the seeds I planted pull through. I am thinking of making a fresh mint ice cream this summer. Oh, and a rhubarb ice cream.

Sunday, April 26, 2009

tabbouleh

I recently bought one too many bunches of parsley. I had forgotten that I had most of a bunch at home when I bought the second, and then my sister gave me most of her leftover bunch after using the couple of tablespoons she had needed for a recipe. She also gave me some mint. What to do with all of this parsley? Tabbouleh. I developed a taste for middle-eastern food when I worked at a lebanese restaurant in college; I still remember the special wrapped sandwich the cook would make me when I left for the day - vegetarian grapeleaves, baba gannoush, hummus, tabbouleh and broken up pieces of freshly fried falafel (this sandwich was not on the menu). It was a huge sandwich, which I could eat for 2 meals, although it wasn't as good the next day. So, presented with an overload of parsley, I made tabbouleh. It was easy, healthy, and delicious, and I decided I should make it more frequently. I am really hoping my mint grows like crazy!

Tabbouleh
2C. finely chopped parsley
1/2C. finely chopped mint
1/2C. bulgar
2T. lemon juice
1-2 chopped tomatoes
2-3T. olive oil
1/2t. salt

Boil ~2C. water; pour over bulgar, cover and let sit 15 minutes. While bulgar is sitting, chop parlsey, mint and tomato, and combine in a bowl with lemon juice, olive oil and salt. Drain bulgar and add to parsley mixture; mix well, and eat. It tastes better after sitting, either at room temperature or in the fridge, for 30minutes.

Friday, April 10, 2009

gardening

They arrived in the mail today; their names are otto, tom, ruby, red, sherry and............This is my third effort at vegetable gardening. The results of my first effort were 2 very tall and weedy tomato plants that failed to bear any semblance of fruit. It really wasn't a very strong effort on my part in that I essentially stuck the plants in 2 pots in a mostly shady spot by the garage and forgot about them until late summer when I noticed that they were still there and somehow expected fruit. Late last summer I planted a few herbs in pots by a sunny window, and these faired somewhat better. My current effort involves a two-pronged approach of starting herbs from seeds, and the tomato plants, which arrived in the mail today. I feel I may have over watered the herbs, but they don't appear to be too drowned (yet). The thyme is the first to come up, but there is still no sign of the basil, mint or lavender. The tomatoes need to be transplanted to bigger pots this weekend, and I'll continue to grow them inside until it warms up more permanently (does this really exist here?).

Tuesday, April 7, 2009

Strawberry-rhubarb crisp

It's hard to cook this time of year. It begins in March, when the winter starts to be too long, and then 'spring' rolls around, and every year I somehow expect there to be fresh local produce in April. Who am I kidding? The motherload of fresh produce doesn't really exist in any form until July, and really only truly arrives in August and September. I grow weary of hearty greens and citrus, and crave berries and tomatoes. But what is it that I REALLY want? Strawberry-rhubarb crisp. Every spring I want this. This year, however, I actually get to make one. How, one might ask, do I have both such fruits in April? I have to thank both my husband and our gigantic freezer in the basement. Husband, because he bought armfuls of rhubarb last year, despite my protest that it was way too much. The freezer I thank for being so deep that I forget what's in the bottom, otherwise I surely would have eaten the rhubarb months ago. For an early taste of spring, I'll make this:

Strawberry-rhubarb crisp
Filling:
2lbs. rhubarb, cut into 1/2in. slices
1.5lbs. strawberries, halved
1C. sugar
3T. cornstarch
1T. lemon juice (~1/2 a lemon)
1/8t. salt
Topping:
2/3C. flour
3/4C. packed brown sugar
1/4t. salt
1/2C. rolled oats
1/4-1/2C. nuts (almonds, walnuts, pecans or a mixture)
1/4t. nutmeg

Preheat oven to 425 degrees F. Combine all ingredients for filling in a large bowl and mix carefully; spoon filling into a 3-quart baking dish. Stir together dry topping ingredients in a bowl, then blend in butter with a pastry cutter or fork until a coarse mixture is formed. Spoon topping evenly over filling. Bake until fruit is bubbling and topping is lightly browned, 45-60 minutes (slightly longer if using frozen fruit).

Saturday, April 4, 2009

Pizza

I am just as apt as the next person to order a pizza for dinner when I don't feel like cooking, especially since I have can pick one up on my walk home from the train. However, I would argue that take-out pizza is way overrated, because it's fun, delicious, and relatively simple to make at home. The crust is a simple yeast dough (flour, salt, olive oil, yeast) which doesn't require a long rise. Whether you make it yourself, or use frozen dough from the store, it's also generally a lot less greasy than anything you would order in. It took me awhile to realize this, but it also doesn't require a ton of toppings. In this regard, it's somewhat like an omelet in that it's a good way to make use of those leftover bits of things that too often go to waste. If you do decide you like to make your own dough, like me, you can make a large batch and freeze it, which saves even more time during the week. My current favorite is extremely simple, just fresh mozzarella (even better in the summer with fresh basil). I like to make my own pizza sauce, too,which is also very simple (can of tomatoes, oregano, olive oil, salt). In the summer, you can also throw the pizza on the grill, which cooks super fast, but requires a little variation in topping choice given the short cooking time. One of my current endeavors is to perfect my crust; to be honest, the quality of my crust is quite variable. It probably doesn't help that I never remember which recipe I used last, and since the differences between recipes is so subtle, I usually just grab whichever cookbook is the most handy. Hopefully if I document my progress here it will help.

Pizza dough (1) (makes 2 pizzas)
1C. water (110 degrees F)
pinch of sugar
1/4oz. yeast
1t. salt
2 3/4C. all-purpose flour
1-2T. olive oil
In a mixing bowl, whisk sugar into warm water. Whisk in yeast, and let stand ~5 minutes, or until foamy. In a food processor pulse flour and salt to combine. Pour in yeast mixture and oil, then pulse until dough just comes together. Squeeze a handful; it should feel smooth and moist, but not stick to your fingers. Knead until a smooth ball forms. Place ball in an oiled bowl; cover and let rise until roughly doubled (~1h). Deflate dough, divide into 2 balls. Place one ball back in bowl, and roll remaining ball into a round and place on parchment or silpat. Cover and let rest at least 5 minutes (up to 1h) before baking pizza. Wrap remaining ball in plastic wrap, then foil, before storing in freezer (you will need to thaw overnight in the fridge before using).

Meatloaf

I hated meatloaf as a kid; I also hated meatballs in any format (swedish, barbeque, with spaghetti). However, as an adult I have discovered that I love both, so long as they are good. I have made several, and the best ones have some complexity to them, such as fruit, nuts, or a combination of meats, and I definitely don't like them to be too heavy/leaden. A basic recipe is also quite good, but I really loved both the recipes I made recently, apricot turkey meatloaf and this rustic french meatloaf. Meatballs are a bit more finicky, but meatloaf is a great dish to make on a Sunday and eat through-out the week, since a single loaf goes a long way. For dinner all one needs is a vegetable side, and though you can eat it cold, I prefer it pan-fried in a bit of olive oil, or warmed in the toaster oven for a few minutes. I haven't quite come around to eating a meatloaf sandwich, but we'll see.

Monday, March 2, 2009

i love beets

People either love or hate beets. I love beets; they may be my favorite vegetable (or at least they are right up there with tomatoes, arugula, broccoli rabe, roasted red bell pepper....). My beet love affair has a clear point of origin, with my mother's pickled beets. I can put away an entire jar in one sitting if I don't pace myself. I think I lost track of beets for awhile, until I spied a bunch at the farmer's market a few years ago. I also discovered that, low and behold, they come in several different varieties. My most favorite are the pink and white-striped chiogga beets, which I only discovered last summer. There is really no need to make them complicated: simply peel, throw a little olive oil, salt and pepper on, and roast for ~1h at 425 (you can also roast, then peel if so desired, or boil, but I definitely think they are better roasted). When they come out, throw on a little more oil, splash on some vinegar or lemon juice, sprinkle with some freshly chopped herbs, and you're good to go (taste as you go, adding more or less of things until they are just right). If you want to get fancier, add some chopped shallot, nuts, and citrus zest. My favorite combo is walnut oil, orange zest, lemon juice and mint. An additional note - they are absolutely gorgeous!

Saturday, February 14, 2009

Grains

I just got a fabulous new cookbook, Whole Grains Everyday, by Lorna Sass. The book does an amazing job of reviewing the various grain types, the forms they come in, and how they are used. It is organized extremely well, and the recipe section and photos are inspiring. For each recipe, there are listed alternate grains that can be used, which is good since most of us likely don't have an entire pantry full of all the grains included in the book. That being said, after looking at this book, I certainly wish that I did. Also extremely helpful is the chart on cooking different grains in the pressure cooker; I really do think the pressure cooker is a major enabler for grain cooking (among other things). I ate this delicious salad for lunch today -

Wheatberry salad with apples and mint (adapted from Whole Grains Every Day, by Lorna Sass)
1/2C. fresh-squeezed orange juice (~1-2 oranges, depending on the size)
1/2t. orange zest
1/2-3/4C. chopped fresh mint
2T. olive oil
1/2t. salt
1 1/2T. apple cider vinegar
2C. cooked wheatberries
2 apples, cored and chopped
1/2C. pecans, coarsely chopped (hazelnuts or walnuts would also be good)

Blend orange juice, mint, olive oil, vinegar and salt in blender. Combine mixture with wheatberries and orange zest and let sit at room temperature 15-20 minutes. Taste and add additional salt if necessary. Stir in chopped apples and nuts and serve. Makes 2 generous main-dish servings, or 4 sides.

Friday, February 6, 2009

Puffed Oven Pancakes

The perfect accompaniment to fresh fruit for breakfast, these "pancakes" provide a subtle but fantastic backdrop to any kind of berries, peaches, mangoes or whatever fruit you happen to have on hand. They are more like a crepe than a pancake and really require fresh fruit rather than a sauce.
Adapted from Gourmet Magazine, circa 2000.

3 cups Fresh Fruit, sliced and mixed with a little lemon juice and sugar
2 tablespoons Butter
2 large Eggs
1/2 cup All Purpose Flour
1/2 cup Whole Milk
1 teaspoon Lemon Zest
1/2 teaspoon Vanilla Extract
Confectioner's sugar, for dusting (optional)

1. Preheat oven to 475F
2. Chop fruit and mix with sugar and lemon juice
3. Put one tablespoon into each of two ~6 inch cake or pie pans, place in oven to melt
4. Wisk eggs until well mixed
5. Wisk in flour until well mixed
6. Mix in milk, zest, vanilla and salt
7. Pour half of batter into each of the two pans
8. Bake for 12 to 15 minutes until golden brown
9. Remove from pans, fill with berries and dist with confectioner's sugar

Sunday, February 1, 2009

marmalade

I will be the first to admit that I don't like preserves much, and I most definitely would not eat a piece of toast with jam or jelly of any sort. The exceptions are my mother's strawberry freezer jam, which I made several batches of this past summer, and a select few I've purchased over the years, such as American Spoon varieties. Since I don't eat them on toast, one might wonder how it is that I do eat them. I've always loved a spoonful with vanilla ice cream, and on warm biscuits (I still prefer honey on these), but over the past several years I have started eating preserves with Greek yogurt for breakfast. I love this so much that I have mostly given up eating the pre-flavored yogurt varieties in favor of mixing my own. Jon likes preserves of all sorts, and eats them on pretty much anything. He likes orange marmalade, which I have never liked. A few weekends ago, looking for a Sunday afternoon project, I was inspired by Martha Stewart's January 2009 issue, which had a section devoted to marmalades. Given that I had a gigantic bowl full of a variety of citrus, I decided to make a blood orange/tangelo/orange variety, with meyer lemons. I am now a marmalade convert, and the recipe made a huge batch of marmalade, with only a handful of citrus. We ate it with cheesecake, and of course I have been eating it with yogurt. I am now a complete convert! Since the orange recipe, I have also made a bath of this.


chocolate bouchon

Almost 2 years ago we came to Boston looking for a house. Given the sticker shock, as well as the space we were currently living in, we headed north of the city on the train and ended up in Salem. We wanted to live close to a train stop, and we loved that it appeared to have a growing downtown space, as well as beautiful old architecture. But I think a major selling point was the bakery. Our realtor told us that there was a new bakery, which had just been opened by a young couple, on the street level of the building we were looking in. The weather was awful, a typical New England spring day, cold, rainy, and windy. The chocolate bouchon we purchased there was amazing; so amazing that it more than made up for the horrid weather. It was a dense deep chocolate cake with chocolate chunks remniscent of a brownie, but better. Given my intense love of chocolate and baking, I vowed to find a recipe. It took me a bit of googling, but I eventually found a recipe from the Thomas Keller book, Bouchon. It is a perfect year-round treat, but is particularly enjoyable in the dregs of winter when you need a pick-me-up.

P.S. We have tried mostly everything from the bakery at this point, and we are currently enjoying a loaf of brioche. If anyone is ever in the area, definitely go to
A&J King, which now has an espresso bar and serves delicious sandwiches. If you want bread, you have to go early, though - they sell out fast!

Chocolate bouchons (adapted from Bouchon, Thomas Keller)

3/4C. all purpose flour (3.5oz)
1C. unsweetened cocoa powder (I typically use dutch processed)
1t. salt
3 large eggs
1.5 C. + 3T. sugar
1/2t. vanilla extract
24T. unsalted butter, melted then cooled until just slightly warm
6oz. semisweet chocolate chunks (can use chips, but I prefer to chop chunks from a block)
Confectioner's sugar (optional)
Serving suggestions: ice cream, whipped cream, fresh berries, or preserves

Butter and flour small baba molds. Preheat oven to 350. Sift the flour, cocoa powder and salt into a bowl; set aside. In the bowl of a mixer fitted with paddle attachment, mix the eggs and sugar 3-5 minutes, or until thick and very pale in color (can use hand-mixer, but it will take longer). Mix in the vanilla. On low speed, add ~1/3 dry ingredients and mix ~30 seconds. Add ~1/3 butter and mix thoroughly. Repeat with remaining dry ingredients and butter. Add the chocolate chunks and mix to combine (batter can be refrigerated up to 1 day). Put molds on baking sheet; fill with batter ~2/3 full. Bake 20-25 minutes (timing may vary depending on the size of your molds). The tops will look shiny and set; test with a toothpick: it should come out clean, but not dry (there will be some melted chocolate from the chunks). Transfer bouchons to rack to cool. After a few minutes, invert molds and let bouchons cool upside down, then lift off molds. To serve, dust with confectioners sugar. Makes ~12 3oz. bouchons.

Sunday, January 25, 2009

Chili

The best chili I've had is at Zingerman's Roadhouse. You can pick it up by the quart from the trailer in front (the "roadshow"). It's far too spicy for those who like their chili mild and is nothing like the chili you'd find in 99% of diners. Rich in smokey chili flavor, this is another matter entirely. It's hot enough at the finish that you need to eat another spoonfull quickly to cool down the last one. It's so good, I'd probably eat it that quickly anyway.

The closest recipe I've found is the one below, which has been adapted from Martha Stewart's Chili Con Carne. The ancho chiles are clearly the secret to the smokey flavor. While I've had the best results when following the recipe precisely, it is good enough that even when not quite as good, it's still a mighty fine chili. If you can't find or don't have anchos on hand, other dired or fresh chiles will suffice, as long as you're careful not to make it hotter than you can tolerate. If you're using fresh, roating the pepper will give you some, though not all of the smokiness of the dried. I've made this most often with a roasted poblano peppers, of which I happended to score a box of ~50 of at the farmers market several years ago and still have some in the freezer.

The recurring dilema with a recipe like this is which beer to use. While it will be good with nearly any beer, the beer will affect the flavor and better beer will make better chile. That being said, if I had three beers on hand, I'd dump the worse two in the chile and save the best to drink alongside.

3 Ancho Chiles (dried poblanos, or use fresh or other chiles)
2 tablespoons Vegetable Oil
4 oz Pork, finely chopped
2 pounds Beef Chuck, cut into 1/2-inch cubes
2 cups White Onion, chopped (or yellow)
3 cloves Garlic, minced
1 teaspoon Cumin, ground
1 teaspoon Oregano, dried (or 1 Tbs fresh)
1 Bay Leaf
Salt, to taste
28 oz Canned Tomatoes, crushed or sauce (or whole/diced pulsed in blender)
24 oz Beer
1 tablespoon White Vinegar

Toppings: any combination of avocado, guacamole, sour cream, cheese, scallions, cilantro, tortilla chips, crumbled bacon

1.Toast chiles in a skillet over medium heat, turning often, until fragrant and puffed up, about 2 minutes.
2. Cut chiles in half, remove cores, reserve seeds, transfer chiles to a bowl, cover with boiling water and set aside.
3. Heat 1 tablespoon oil in a large Dutch oven over medium-high heat.
4. Add pork; cook until browned, 3 minutes per side. Remove pork.
5. Add beef in batches, cooking until browned, about 3 minutes per side, adding oil as needed. Remove browned beef.

6.Meanwhile, put chiles and 1/2 cup soaking liquid into a blender; puree.
7.Reduce heat to medium-low. Add onion and garlic, and cook, stirring often, until softened, 6 to 8 minutes.
8. Stir in cumin, oregano, bay leaf, 1 teaspoon salt, and 2 tablespoons reserved chile seeds (more for heat, if desired). Cook 1 minute.
9. Add chile puree. Raise heat to medium-high and stir for 2 minutes.

10. Return meat to pot.
11. Add 2 teaspoons salt, the tomatoes, and beer. Bring to a boil; reduce heat to medium-high.
12. Simmer, stirring occasionally, 75 minutes.
13. Reduce heat to medium-low; simmer, stirring occasionally, until meat is tender and sauce is thick, about 30 minutes more.
14. Discard bay leaf. Stir in vinegar.

Thursday, January 8, 2009

Pasta Sauce

Among the strongest of family traditions, handed down from my Grandmother born in the town of Gubbio, Italy, is this pasta sauce recipe. Although I generally think most recipes can be tinkered with, I've come to find that this is best when followed to the last detail. Okay, there is one exception: it is even better if you throw in a slice of bacon. This is terrific on store-bought pasta, even better on homemade and other-worldly when combined with the family ravioli recipe. The better-half likes to eat is as a soup.

2 Tablespoons, Olive Oil
2 Tbs Onion, chopped
1 clove, Garlic, chopped
1/2 Pound Ground Beef
1 Celery Stalk, chopped
1 Carrot, chopped
Pinch Red Pepper
1 teaspoon Dried Basil, or 1 Tbs fresh
1/2 teaspoon Dry Oregano, or 1/2 Tbs fresh
1/4 Cup Red Wine
2 28oz Cans Tomato Sauce, or crushed tomatoes

1. Heat the oil in a 2 quart or larger saucepot over medium heat
2. Add the Onion and cook until translucent, about 5 minutes
3. Add the garlic and herbs and cook 1 minute
4. Add the beef, red pepper, celery and carrot and cook until beef is browned, 3 to 5 minutes
5. Add the wine and cook until mostly evaporated, 3 to 5 minutes
6. Add the tomato sauce.
7. Bring to a gentle simmer and cook at least 1 hour. Cover or uncover to control thickness.

Wednesday, January 7, 2009

Collard Greens and Bacon

This recipe combines two of the great joys in life: collard greens and bacon. It doesn't get any better. Collards freeze well and so by stocking up when they are abundant in late summer, you can enjoy this wintery dish repeatedly until fresh greens are available again in May. This is a perfect accompaniment to a side of grits or heaped on top of grilled polenta cubes. I was scarfing down a bowl of this and cheddar-chile grits when I discovered the 7th law of bacon: the key to eating less meat is more bacon.
Adapted from the Gourmet Cookbook (p. 541)

1/4 Pound (4oz) Bacon, chopped
1 to 2 Cups Onion, chopped
2/3 Cup Chicken broth
2 Tablespoons Cider vinegar
1 Tablespoon Brown sugar, dark
1/4 teaspoon Red pepper flakes, or 1 dried red chile
1 teaspoon Salt
2 pounds Collard greens, leaves stripped and ripped and stems chopped

1. Cook bacon over medium heat until juices render, about five minutes. Drain all but 2 Tbs fat.
2. Add onions and cook until soft, about 5 minutes.
3. Add everything but the collard leaves and simmer for 1 minute.
4. Add the collards, toss until wilted.
5. Cover and simmer, stirring occasionally, 60 minutes.

Pressure cooker method: Follow steps 1-3 either on stovetop or in pressure cooker pot on browning mode. Add collard greens and steam until wilted. Stir and cook under pressure for 20 minutes.

Maple Bacon Beans

These beans are proof that some of the best dishes are really quite simple. Bean, bacon, onions, mustard and some maple syrup make a perfect combination. With some breadcrumbs on top or a slice of toast, it makes a great winter dinner. In summer, it makes a great side for picnics and barbeques. As with most things, the better the bacon the better the results. Tonight I used 2 slices of hickory-smoked bacon from Zingermans along with 4oz of salt pork.

Adapted from Gourmet Cookbook (p.269)

2 Cups (14 oz.) Navy beans, dried
7 oz Salt pork or bacon, whole or diced
1 Cup Onions, chopped
2 teaspoons Salt
1/2 teaspoon Black pepper
2/3 cup Maple syrup
1 teaspoon Mustard, dry (or 1Tbs wet)
4 Cups Water (or substitute up to 1 Cup white wine)

1. Soak beans in 2 quarts cold water in refrigerator for 8 hours or more. Drain.
2. Preheat oven to 300F
3. Mix all ingredients in an ovenproof 3 quart or larger pot or baking dish.
4. Bring to boil on stove.
5. Cover tightly and transfer to oven.
6. Bake 2 hours or until beans are tender.
7. Uncover and bake 60 to 90 min more

Pressure cooker method: Replace steps 3-6 by cooking all ingredients in pressure cooker for 40 minutes. Finish with step 7 in oven or on steam mode in pressure cooker.

Tuesday, January 6, 2009

pressure cooker

At my request, my mother bought us a pressure cooker for Christmas. Up until recently, had anyone asked me about pressure cooking, I would have given the vague reply that my mom used to can things in hers. I can picture it on her stove, the steam vent spinning and sputtering around on the top, emitting a steady line of steam. Several years ago there was an incident in which the cooker got stuck shut with a whole batch of what my mom said was her best sauerkraut. My dad was able to rescue the kraut by sawing off the top somehow, but she had to get a new pressure cooker. I didn't want it so much to can things, but to cook things rapidly, specifically beans and whole grains. I like to buy beans dried, both because they are cheaper, and often tastier, but I often forget to soak them in advance. Thus, the pressure cooker. In the fast few days, we cooked wheatberries (only 30 minutes!) and collard greens (20!). I also discovered that our cookbook, Vegetarian Cooking for Everyone (Deborah Madison) has many variations for using the pressure cooker. My model is especially nice, because it doesn't use the stove, has low/high pressure, and saute and slow-cooking functions.

Thursday, January 1, 2009

Food goals

I do not believe in setting goals specifically upon the new year, but instead chose to make continual efforts to make my life, and that of my loved ones, better. That being said, I have a few things I have been thinking about in the past couple of months that I would like to keep in mind in the months and year to come. Inspired by many recent purchases, my sister-in-law, and my mother's gift of 3 jars of pickled beets upon our holiday departure, I would like to learn more about fermenting and preserving vegetables. Living in the northeast, there is a real lack of produce in the winter months, not to mention anything local. In the past, I have gotten better at purchasing large quantities of produce in the summer and storing these items to eat in the winter. However, this may not be the best way to preserve all items. In addition, I would like to work on incorporating more grains into my diet. I love them, but I don't think to make them as often as I should. I would also like to try making my own cheese, and find a great store to purchase free-range, organic, local meat products.